


We're Here to Support You
Expert Tech Support for Your Journey
At Nomadic Innovations, we know how important it is to keep your journey on track. If you’re encountering an issue with one of our products, our expert tech support team is here to resolve your concerns as swiftly and efficiently as possible.
Please fill out the form below with as much detail as you can. This allows our technicians to provide a solution tailored specifically to your setup and equipment needs.
Whether it’s a quick fix or something more involved, we're dedicated to making your experience seamless and hassle-free. Let’s get you back on the road to adventure.
Technical Support
Equip | Resolve | RoamHaving trouble with your gear or need guidance on a feature? Complete the form below. Our team will review your request and get back to you with a diagnosis within 24 hours.
Order help or general inquiry? Click Here →Helpful Videos

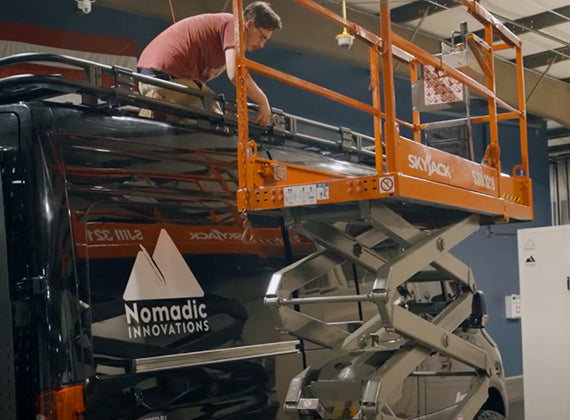
Join James and Open Road Campers as they walk you through a step-by-step installation of the Nomadic Cooling X3 air conditioner.
Jonathan and Caleb as they walk you through the complete installation of the Nomadic Awning
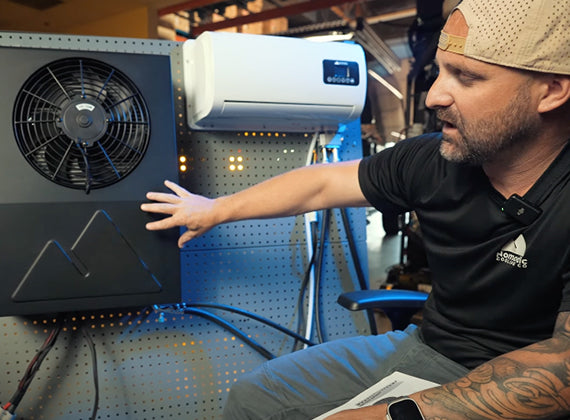
Jonathan as he introduces our latest breakthrough in cooling technology: the Mini-Split System.
Frequently Asked Questions
X Series Error Codes - Why is my control panel showing an E or O error code?
These codes are designed to help point the user or technical support to a specific anomaly setting off the balance within the AC system. These codes range E0 to E4 and F0 to F7 for the X-Series models. A reference chart can VIEWED HERE.
Why is my X series leaking condensation through the faceplate?
Condensation coming from the outgoing air stream of an AC unit is more than likely a scenario of a frozen evaporator resulting from over running the AC in a high humidity atmosphere, causing an excess of water buildup. Here are some options to help mitigate that unwanted intruder!
- Run time operation. Start by bringing your ambient room temperature down over a longer period of time by running the AC in a lower fan power mode with the set temperature on your control panel to something more relative to the temperature you desire to end up at. For best results, avoid running the unit in powerful mode for more than 30 minutes at a time.
- Better insulation. Work to insulate your interior better and mitigate any outside airflow contaminating your cabin space. The better you handle maintaining the difference between the outside air and your interior space, the better the AC will operate. Keep doors and windows closed as often as possible when the weather is hot and minimize the amount you go in and out of the vehicle. Much like you would your house!
- Dry your air. A dehumidifier in the cabin of your vehicle could be a great help to mitigate moisture in the air, which motivates the condensation created on the exterior of your evaporator fins.
Why is my control panel not turning on?
An inoperable control panel can be caused by an assortment of things. Here are a few things to try in order of operation:
- Check the incoming power from your vehicle's power source to the AC unit to be sure things are as they should be. Optimal voltage and amperage can be referenced per each model in there individual documentation on our resource page.
- Next, check the inline blade fuse running to the control board from the outgoing air chamber from inside the vehicle. You'll have to remove your face plate or any other trim in order to access it. If it blows, it should be replaced with the same value blade fuse. Generally, a 20A will suffice.
- If this does not resolve the problem, it is also worth investigating the pins at the connection point where the controller connects to the wiring harness.
- If all of these checkout, then we can take more drastic measures! Follow the reset PDF attached here to reset your controller and take it back to the default setting in the rare case that its internal programming has become corrupt.
Why is my unit not blowing cold air?
If your AC unit is producing a temperature that is not as cold as expected or warmer than it used to, there could be a few possibilities:
- The most likely is that your intake thermistor sensor may be in the wrong location. It should be located on the side of the AC unit that is pulling air from inside the cabin, your ambient air. If it does not look like this photo, try arranging it as so.
- Another potential could be that the ambient cabin air going into your AC unit’s intake may be polluted by the cooler air coming from the AC unit. This would trick the AC unit into thinking it has reached its set temperature and will throttle back the compressor speed. Be sure the two openings are affectively divided as airtight as possible to avoid them polluting each other's air per the install manual.
My internal fan won't cut on, what gives?
If you are confident working your way around a multimeter, let's start by checking a few data points:
- Let's validate that the fan is or is not faulty. Unplugging the 3 cable plug (Yellow, Black, Red) will remove the internal fan from the system and allow you to check the fan motor's resistance. Setting your multimeter to Ohms, a resulting reading of infinite Ohms signals a seized up motor when crossing the red and black wires.
- Assuming the fan is not faulty, we can check that it is getting the correct voltage. Making sure the fan is plugged back in, turn the unit on at the control panel and turn the fan up between level 3 and 5. The units PWM signal voltage at the yellow wire leaving the back of the control panel should read between 2.5 and 5.4 Amps.
- If those two things are as expected, we can move to check the source voltage for the fan motor itself. With the control panel on, you should be able to separate the plug going into the foam housing under the shroud which connects to the internal fan (Mentioned above) and check for voltage across the red and black wires on the system side of the plug. Reference your specific units documentation for what that voltage should be, in the large majority of cases it should be around 12V.
Best way to operate the unit?
Running an AC unit on a DIY installation is all about managing expectations and accurately calculating the possible results for your specific needs. We recommend treating your AC unit like your favorite car. All motor driven systems have limits, and most of them are governed. We have made a customer-based decision to allow you the freedom to run your AC unit the way you want to! You pay good money for a premium product and deserve access to what it can do.
With that in mind, remember to take care of that high performance machine. For best longevity and results out of your AC unit, we recommend the following:
- High heat, start slow! When the summer is baring down, internal temps climb exponentially. Jumping in your hot van and cranking the AC unit to max performance for a long period of time would be like hooking a truck to a trailer pay over its loaded tow-rating and heading for the nearest mountain pass. Goodbye transmission! . . . Luckily, our units have self-arresting properties before they fully harm themselves; this is for the benefit of the system. However, it does mean that in extreme conditions, the unit's evaporator may freeze over if allowed to run that hard. In these conditions (90+ degrees, 70%+ humidity) we recommend giving your unit time to bring the internal temps down more gradually until the temperature delta of the outside to your interior has reduced. Putting less strain on the system. Running the system on higher output settings should be limited to a maximum of 30 minutes until that delta has come down.
- Bears hibernate, AC units shouldn’t! If your vehicle sits for extended periods of time, its battery can die, or worse, other parts may seize. You boat owners out there know it’s crucial to winterize that water pleasure or you'll be upset come spring! An AC unit needs seasonal attention as well. Luckily, this doesn't necessarily mean maintenance, but just to get out and stretch its legs. We recommend at least twice a month to run the unit through its paces: make sure the exhaust fan is clear of debris, your power source is strong and balanced, and that the AC unit responds and produces an air temperature colder than your ambient air. As well, it's good to cycle the internal fan through all of its available speeds!
Does the color of the Shroud matter?
An AC unit’s shroud color will not noticeably affect its functionality or performance. An argument could be made that in hotter, more exposed climates, the internal components of a black shroud may be required to run at higher temperatures - this can affect the longevity of any mechanical or electrical component. It could also be argued that the internal temps of a black shroud may keep the components warmer in colder climates with sun exposure, freeing them up to run better! These affect however are marginal at best, and we advise that you base your color decision completely on aesthetic preference so your ridge looks as rad as you when out seeking adventure!
Do portable power stations work with our AC units?
Electrical power supplies are growing by the day as technology continues to advance. We are seeing a lot of new and very versatile plug and play power sources as high as 48V in today's market. It's valuable to clarify before we get too caught up in that questions what defines a "Portable Power Station".
These are units unique to their mobility. A portable power station is one that can be moved and easily removed and relocated to another piece of equipment, trailer, vehicle, or the like. The most common example of this is a generator. While some units out there are robust and large enough to run an AC unit with a consistent DC voltage requirement, they are rather cumbersome and require fuel.
Beyond those, some companies are beginning to make power supply packages in the 12 and 48V range, which are considered plug and play and could be mistaken as portable. They are less portable than perhaps understood and the amperage created by them are often not sufficient enough to take full advantage of our AC units.
Why does my compressor cycle up and down?
If your compressor is turning on and off in short bursts (cycling) it is getting a signal to perform that leaves only a short range of operation needed before the AC unit hits its desired target temperature. This could potentially be a few scenarios:
- It’s all about the signal! Our AC units utilize two (2) thermistor sensors to detect temperature both outgoing and incoming from the AC unit. These signals are critical for the operation of our AC unit’s and their internal programming. When the incoming air (your vehicle’s internal air) becomes equal to the outgoing air, when in auto mode, the AC unit receives a signal to turn the compressor off. For this function of the programming to be implemented correctly, your thermistor sensors must be in the appropriate locations per your AC unit’s install manual. Their separation in distant and location are critical to the nature of that programming.
- Keep em’ separated! While the location of those sensors is important, so is the separation of the air within the AC unit! If you haven’t installed the supplied air separate correctly or done the best you can to insulate the cracks and crevices separating the incoming and outgoing air chambers, it can really confuse the AC unit’s programming and cause the compressor to operate without reason.
- Be wise! A solid head on your shoulders is important in daily life; your AC unit’s control panel is the brain of our systems! All of your AC unit’s logic is stored in the control panel, as such that makes it very important to the system. Take care to make sure nothing is rubbing, dripping, or rattling against it as your vehicle functions or you finish your install. If you believe you've done so but the compressor is still not operating as expected, it may be worth trying to reprogram your controller to its default settings. That procedure can be found in the installation manual for your specific AC unit.
Can I change the lengths of the hoses on my split system (S1)?
You can! If this is something you desire to do, you are free to. You will need to obtain and understand a few things, however:
- Fittings: The S1 comes with pre-determined lengths of hose with permanently crimped fittings. These fittings are not reusable and will need to be replaced once you cut your hose. The fittings are 90 degree o-ring fittings, standard size #6 and #10 with charge ports. We recommend using Dan-Foss EZ-Clip style fittings.
- Refrigerant amount is important: By changing the length of your lines, you remove or add volume to the system's internal refrigerant system. This means the standard charge amount of 600g will need to be adjusted accordingly. AC units rely heavily on the right balance of refrigerant in the system to perform at their best; calculate accordingly. An easy starting point would be to divide the new length by the default length of hose for a percentage of difference. Then multiply that percentage by the standard fill amount.
Ex: 12' hoses down to 4.5' - 4.5/12 = 0.375 → 0.375 X 600g = 225g
You can then adjust the amount up or down until you've reached the desired performance level based on traditional pressure ratings for the high and low sides in an AC system. Be aware that an overfilled system will stall your compressor. In the case that it does you will receive an error code on your control panel. Error codes for X Series AC Units can be VIEWED HERE.
What are the preset “Mountain Settings” and how can I utilize them?
With the control panel on, press and hold the mountain button until it beeps. You will start to see a flashing voltage reading, followed by consecutive readings by continuing to press the mountain emblem in the following order:
- Voltage in: your power source value at the AC unit.
- Low Voltage Cutoff: The value at which your AC unit will report an E2 code if it drops below.
- High Voltage Cutoff: The value at which your AC unit will report an E3 code if it drops below.
- Intake Thermister reading.
- Outake Thermister Reading.
- A blinking "E" if clear of errors, or an "E#" with the corresponding error number in the case that there is one.
Can I move or extend my control panel? (thermistor wire)
We do not recommend extending our thermistor wires as their length is important to their functionality from an electrical perspective.
Where does my intake thermistor wire need to be placed?
The silver tip of your intake thermistor wire needs to be placed over the filter on the back of the faceplate. The clearest, most unobstructed position for it to accurately measure the ambient cabin air will optimize the functionality of our unit's programming. The installation manual for your specific AC unit shows (graphically) the best location for the intake thermistor.
Do we ship out of country?
We currently only ship to the contiguous 48 states and Canada. We do not ship to Alaska, Hawaii, or any locations outside of the U.S., with the exception of Canada. To ensure we can effectively manage our warranties and meet our customer service goals, all units are shipped with the utmost care using reliable freight services.
Can I shorten or lengthen my power cables for my AC Unit?
Consult this table to determine the correct wire gauge for your Nomadic Air Conditioning Unit. Consult the AC unit documentation to identify the MAX CURRENT FLOW (AMPS) across the top of the table.